MB Wooden Railways
A different approach to wooden railways
Welcome to MB Wooden Railways, which is part of a larger site concerned with Miniature Buildings . It discusses aspects of Brio (and compatible) railways and my own, not entirely usual, approach to them. For my other articles on the subject please go to Railways Articles
My train 'board'
A unique layout for Brio and compatible trains

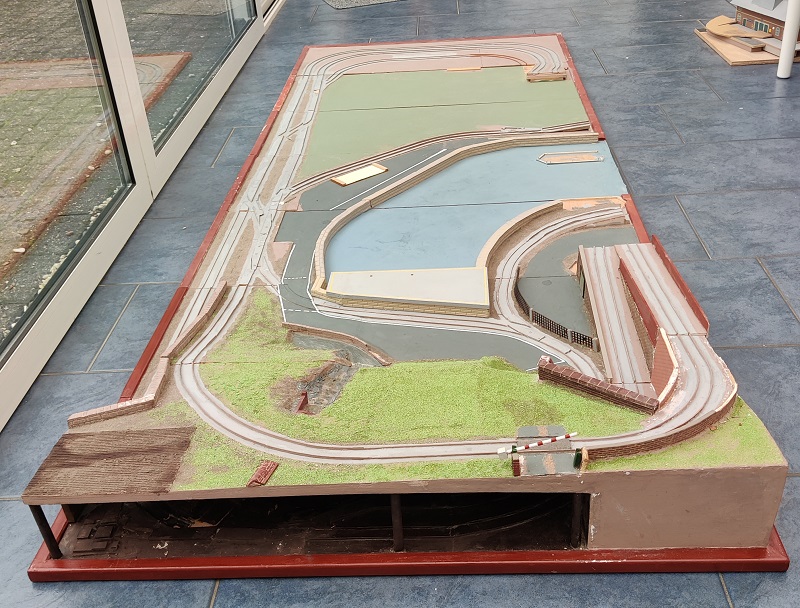
 As you can see this is still a work in progress. I fear it always will be, as I keep having extra ideas for extensions or refinements.
The world of modelling and the world of 'wooden railway' toys do not often meet. An honourable exception is the wonderfully rich modelrailwayengineer.com site which has a whole section on trains for children - mostly wooden railways.
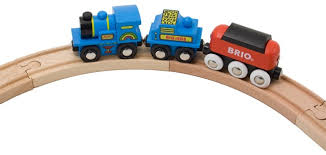
By 'wooden railway' I mean the beechwood tracks more commonly known by the famous brand of 'Brio', which has suffered the same degradation of their brand as Hoover and Biro did. The various manufacturers operating in this sector ("compatible with the leading brand") do produce a few small wooden buildings, usually hopelessly out of scale with trains and track . For them, fine detail is not an issue. Not at all. And, even though this is a model buildings site, I'm going to spend any time on them. That is not what this article is about.
Our grandchildren love playing with the collection of wooden track and trains that we have assembled for them. It has proved the trigger for my latent unfulfilled desire to build a model railway. There are lots of reasons why I have never got into the world of OO, HO or N trains. The electrics, price, layout size, no particular interest in trains..... It's the landscape that really interests me, and the buildings of course.
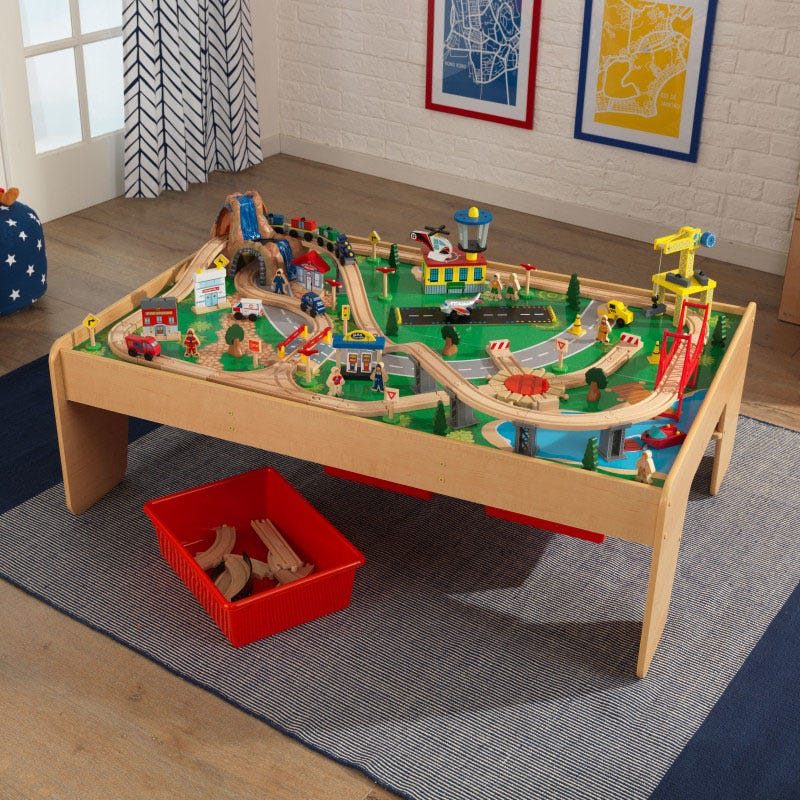
My current, long term, project began as a plan to make a train table (the sort you might see in a shop or a waiting room) but modelling ambition took over. I'm trying to build something grander which I believe is an unusual variant on model railway layouts. Not just some wooden track pinned to a base board. And now too big to go on a table. It sits on the floor. There is a much more detailed description of my process in 'wooden train table.docx' .
I want it to look (moderatly) realistic but it needs to be robust enough for a four, five or six year old to play with - under supervision. It needs to allow smooth running of the sort of battery operated or push along trains that go on wooden railways. There are even some RC ones. It needs to be connectable to the standard wooden track. It needs to be able to be dismantled and stored when not in use. I want it to have lots of interesting features. Even though it's not properly to scale I don't want the various elements to look too out of place.

At the moment there are two tracks leading off the board with connectors for regular Brio track. I have plans for at least two more at the far end hidden in the tunnel and maybe one at the bottom right corner of the picture. The station near the front is the subject of
my Oirschot station article. The extending river section forms the door of the storage box.
A key decision at the start was that I was not going to use sections of slot together wooden track. I am building my own. After a few experiments I settled on plastic rather than wood. Exactly what I am looking for probably exists - somewhere in the Plastruct range maybe - but I opted to make my own. DIY stores sell, usually next to the wooden mouldings, long strips of plastic strip - often in an L shape. Flexible, tough, cheap, readily available and in either black or dark grey as an alternative to white. Using my trusty old Minicraft saw table (which I'm beginning to think should be pensioned off and replaced) I rip it down to 5mm strip getting several lengths out of the strips as sold. For some of the later laid track I have used hardwood strip sold under the xxx brand rather than plastic.

These are secured in place between strips of 3mm hardboard. An old fashioned material but perfect for the job, and cheap. This handmade track can be laid at whatever curve or slope I wish; the hardboard cut to shape with a regular DIY jigsaw. All stuck together on the baseboard with PVA. Any imperfections in my curve cutting can be made good with filler. It's all going to be painted over.
At the present time I haven't bothered with anything sophisticated or realistic like sleepers or ballast - though I have begun experimenting. Unlike real track or regular train set track, wooden railway track has train wheels running along the outer edge of the track rather than on top of it. Sorry purist railway enthusiasts; that's just the way it is. The trackbed either side of the rails has to be smooth and free of ballast for the wheels to run along it. The section between the tracks is simply painted a mid grey colour - using tester pots of emulsion rather than fancy modelling paints at ten times the price. Maybe one day I will go back and add hundreds of 17 x 1.5 mm sleepers and some ballast. Or maybe not.
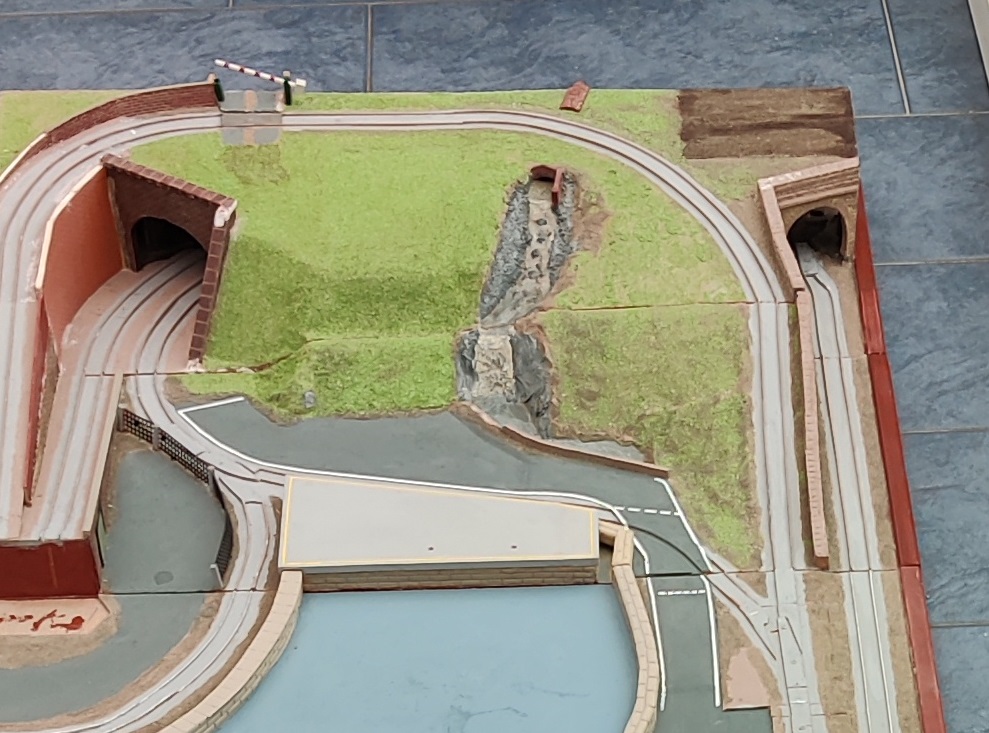
The most detailed end of my board. Hidden in the tunnel are points allowing the track on the right to go onto either of the tracks on the left. A detachable bridge connects to the two tracks on the left of the picture.
Points are a bit of a challenge, but I'll come back to them later. All I will say, from bitter experience, is that it is better to plan them (and crossovers) in advance rather than trying to cut out sections of track that have already been laid!

If this project were to start all over again - before we had acquired mounds of Brio and its clones - I would be very tempted to opt for the Marklin junior 'My World' range. Which look lovely. But there are cost implications for this and the flexibility of track layout would be a bit compromised.
The base board is 12mm plywood cut into 40cm x 90cm sections, which I have edged with a rounded L shaped softwood moulding, again from my local DIY warehouse. This is not the lightest option but provides a good solid base that doesn't warp. At the moment there are seven sections - joined on the 90cm edges with dowels that can be joined and then separated again easily for storage. One of the nice things about battery and push-along trains is that there is no need for all that electrical continuity stuff. The dowels and their corresponding holes need to matched up carefully but once this is done the job of aligning the track from one board to the next is straightforward. No track connections are needed.
From that point on there is really nothing unique about this project. It's just another model railway scenic layout with hills, rivers, fields, roads, embankments, bridges,stations etc. Just a bit simpler and more robust than some. All the usual techniques for landscaping, brickwork and, of course, model buildings apply.
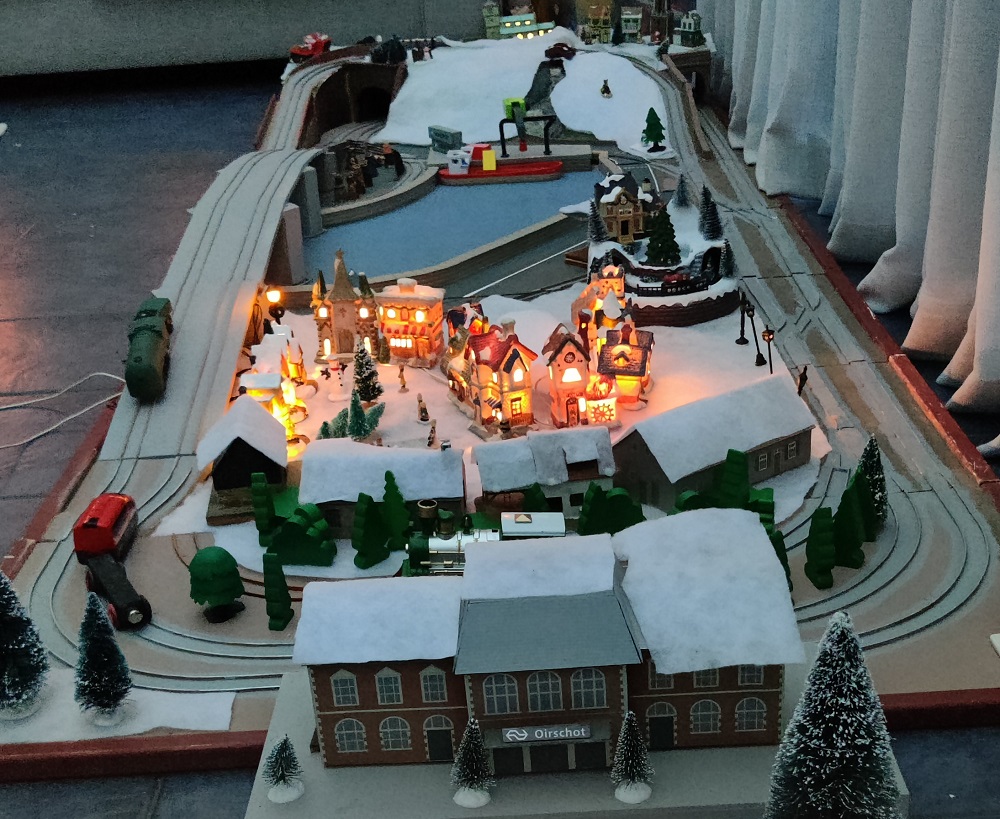
The board dressed for Christmas
I mentioned two things earlier which I will come back to now. Firstly, points. A layout without them is pretty boring so they are essential. They need to be stiff enough to stay in place yet loose enough to move. Getting to the current result has taken a lot of trial and error. Rather than attempting to maintain two tracks I have, in most cases opted for a solid central section in the same way as original Brio track does.
I have ended up with two patterns. One uses a pivoting piece of the central track section. The second pattern, which at the moment I prefer uses a shorter single piece of pivoting track. I began by using the same thin of 3mm plastic card.
Secondly, that the layout needs to be packed up and stored from one grandchild visit to the next. When it is out on the floor it measures 2.8 x 0.9 metres. The whole thing is designed so that the panels can be stored upright on their short edges in a way that uses the underside of three of the baseboard panels as sides of a wooden box. The remaining four panels fit inside the box. Full details of how I made it are in a separate article. I do have to confess that not everything fits inside the box. Notably the stations and the bridge which have to be stored separatly with my boxes of 'regular' track and some home made track elements.
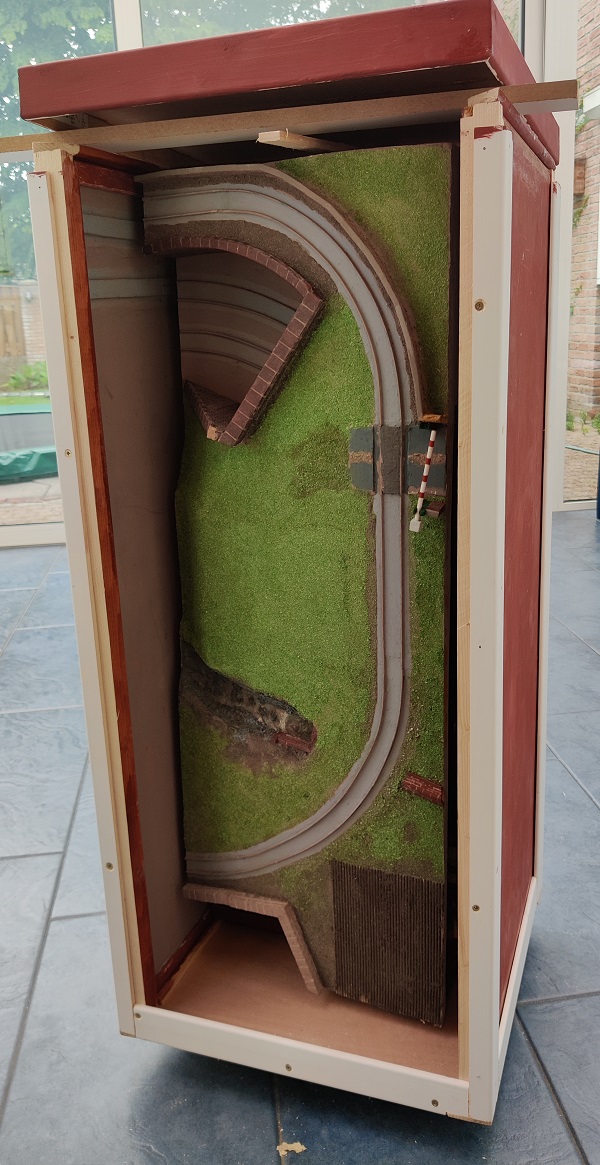
Mounted on castors the box stands about 1.2m high, around 35cm square.
Lastly, a few words on the subject of trains to run on this layout. There are three classes. The original Brio concept was very small push-along trains. Simple in design and a world away from scale miniature versions of prototype locomotives and rolling stock. Particularly on a small layout on a table at a young child's waist height they continue to provide lots of play value encouraging story telling as they are pushed around the layout.
But the world has moved on. The second class contains battery operated trains with forward, reverse and stop buttons typically on the top of the loco. Sometmes with extra features like lights or train noises. Set them going and they trundle off around the layout. And that is about it. It only holds a child's attention for so long and doesn't demand a lot of playing.
The third class is battery operated trains with the addition of 'remote control'. Which puts the child operator back in charge. Station stops and shunting activity becomes possible.
As you might expect, Brio itself offers battery and remote control trains. But they are a bit pricy. Other brands exist at less cost which is particularly attractive if you want to start customising them. Big Jigs is one readily available brand but they can also be found (sometimes) at Tesco, Lidl and Aldi. The weeks before Christmas and Sinterklaas is a good time to look. The Lidl Playtive range is quite extensive. Ikea also have a couple of offerings, as do John Lewis. The Thomas and Friends range also (sometimes) work on Brio track.
.jpg)
Rolling stock is not my usual enthusiasm but has been an interesting sidetrack. Once again I have to offer a warning. This is going to offend railway purists and rivet counters. One of the cheaper brands, but offering quite a powerful little engine is Carousel which was sold by Tesco. I have no idea what this toy is meant to represent. Some sort of generic late era steam train. Finished strangely in baby blue or barbie pink. Without attempting any physical reconstruction I gave one of these a paint job to 'echo' the livery of the Dutch railways - the "NS". Why Dutch? Although I'm a Brit I now live in the Netherlands and five little Dutch childen know me as 'Opa'. It may not be a model of a real prototype but was good enough to be recognisable by the eldest as one of 'their' trains. Humbrol gloss yellow, dark blue and grey. In due course I will find another livery that means something to my first English grandchild. But he is still a bit young for his first toy train, so maybe not this Christmas.
My next project is to take two sets produced by Playtive for Lidl and convert them into a single four coach unit with an engine at each end - one to operate in forward gear and the other in reverse. I'm thinking of the livery of the Thalys - the high speed train running between Amsterdam and Paris via Antwerp and Brussels - maroon and grey.
One of the particularities of these types of train is that they are short. The scale width and height is, very roughly, around 1/80 (somewhere around HO and OO) but the length of the trains, wagons and carriages is way shorter than they would be at this scale. I have become so used to this that when I look at a proper HO model their carriages all look way too long. The main reason for this I think is that the radius of Brio curved track is way too small to allow for a long (fixed) wheelbase.
The only building on the layout so far is the fictitious Oirschot station - the subject of a separate article which includes some more detail about the necessary scale compromises.
The colours I used are mostly bought in the Netherlands so not a lot of help for English speaking readers. They are mostly DIY paints rather than special modelling paints. I suspect they do not conform to the Toy Safety regulations so the layout could never be sold.
Basic ground colour basecoat : Kalahari Brun Perfection Muurverf mat
Basic Track colour : MuisGr. Gris Suris Perfection Muurverf mat
Rail sides: Kalahari Brun Perfection Muurverf mat
Rail top: silver, from Humbrol
Red brick:
Stone wall around small tunnel entrance
Stone wall arond harbour :
Perfection Muurverf mat
Puur Taupe
Kalahari Brun
Gris Gobi
MuisGr. Gris Suris
Sandtex Mid stone - smooth
As always, please
e-mail
Miniature Buildings
if you have something to add. Comments, criticisms,
extra thoughts, pictures, or even complete articles
for inclusion in the Miniature Buildings site
are all welcome. Or if you would like to be added to
my mailing list to hear when a new article is published.
David, last updated March 2024.
There will be more to add as the project develops.