MiniatureBuildings.co.uk : Exploring model buildings of all sizes and styles
- Page (top)
- Home
-
About
Us -
Recent
Articles -
Scales &
Uses - Modelling
-
All
Articles
Miniature Buildings
(top of page)
Home
Articles
- Miniature
Buildings - Home +
-
Recent
Blogs -
All
Articles
.
Miniature Buildings
Some thoughts on building models of all types and sizes
Some thoughts on building models of all types and sizes
Welcome. If you have not visited Minature Buildings before can I suggest you begin with my Aims and Scope article or at the Home Page. If you have visited before - welcome back. I hope this article is of interest to you.
Refreshing Eastern Manor
(An earlier version of this article is also available on the Dolls Houses Past and Present site)

from the light and the faded paper outside.
Compare the red brick paper that had been hidden from the light and the faded paper outside.
I don't know who made Eastern Manor. I picked it up a couple of years ago at the Tring Auction House (Hertfordshire in England). Judging from the materials and some of the fittings I suspected it dated from the 1970s or 80s and that the child(ren) it was made for are long grown. It seems likely that it had been sitting untouched for some years in a garage or attic. The brick paper on the outside walls was seriously faded and begining to peel. Bits were beginning to fall off it. But the interior decor was still in good condition and the structure was sound.
I suspected from the construction it was made by an individual hobbyist rather than a commercial operation. But it turns out that it originated as a kit from the Dolls House Emporium called 'Springwood Manor'. Thank you to Zoe H and Michaela at Dolls Houses Past and Present for this identification. Michaela commented that it is a sweet little house. And I agree - at least for a childs plaything. But it surprised me that it was a commercial kit. For reasons we will come to. It is no longer offered for sale on the Dolls House Emporium site but is available at Hobbies.
My track record of making houses from scratch is not good. I have several part finished models sitting around. I also have a (step)granddaughter who was just the right age for a dolls house to play with. Refreshing Eastern Manor ready to be a Christmas present from 'Opa' felt like a manageable project. Though, in traditional fashion, the last piece of painting was still done on Christmas Eve. I recall my father doing exactly the same thing some fifty five years ago on my sister's house.
I do wonder if the original builder had the same issue. He or she had done a great job but there were a couple of bits that felt as if it was handed over a few days before it was fully finished.
There was a little note attached to it at the auction room advising caution - the roof had to be lifted before the door front could be opened. Which must have made playing with it awkward. Lifting the roof with one hand and opening the door with the other was a fiddle, though no great issue, for an adult. But impracticable for a small child. Fixing this was the first step.
I chose to raise the roof rather than cut down the front wall.

The roof overhang came down over the opening wall at the front and was corrected by a triangular fillet pinned and glued to each of the side walls
Fortunately this change of roof angle was small enough not to require the dormers to be repositioned. Two other changes were needed though.
The hinges had not been properly fitted originally and needed to be cut into the surfaces. Straightforward on flat pieces of wood on the workbench before assembly but a fiddly job to be done in situ.
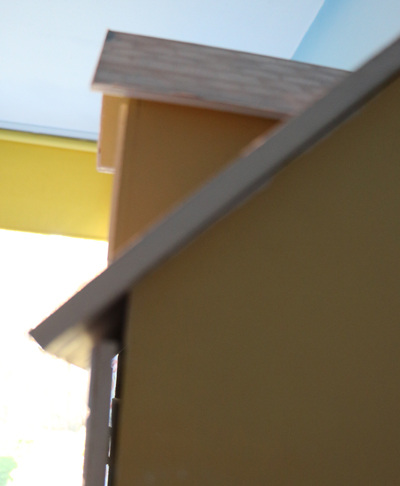
More directly as a consequence of raising the roof there was a small gap, visible from the side and from low down, at the top of the front wall. It was necessary to fix a small new section of wall attached to the roof to fill the gap.

The additional wall section pinned and glued to the underside of the roof
The other adjustment which had to be made was to the chimneys. These sit on the back of the roof. The modeller in me, as opposed to the toymaker, was troubled by the fact that the chimneys on the roof bore no relation to where the fireplaces were, or should be, inside the house. Wise counsel, from my nearest and dearest, reminded me that this was for a two year old to play with. Not for submission to an exhibition judge.
The purpose of the chimneys turned out to be a support for the roof when it was folded back to allow access to the attic rooms. Some repositioning and refixing was needed.
part way through fixing the tile sheets
And, at last, onto the decorative refreshing. The biggest single task in this project was re-roofing. While brickpaper may be acceptable on small scale models (though I'm not convinced at 1/12 scale)I draw the line at tile paper. The texture of tiles means that something three dimensional is needed. For Eastern Manor I opted for some moulded plastic card pantile sheets 'Spanish tile' I bought many years ago from Model Builders Supply of Aurora Canada. They are still in business.
The size of the sheets and the irregular shapes caused by the dormers and the chimneys meant that I had quite a lot of cutting and fitting to do. A bit of a jigsaw puzzle. Plus I only just had enough and the last section on the back roof was a lot of small bits pieced together. Not ideal but cheaper than sending to Canada for one extra sheet.
With hindsight I should have taken more care than I did. I figured that I would be able to make good with filler but it proved harder than I expected. So what's new?
To glue them on I used a heavyweight combined glue and filler from the builders' merchant section. You know, the rigid plastic tubes mounted in a cage and forced out with a trigger mechanism. The moulding on the plastic sheets is deep and as well as gluing them it was necessary to fill the voids between the sheets and the roof substrate.

Now the work really began. I wanted to make the roof edges look a bit realistic. My chosen method was to glue wooden strips along each exposed edge, fill the gaps between the wooden strip and the curved tiles and then carve the edge tiles. It kept me entertained for days. Weeks? It was a labour of love. A good job I was not charging my pre-retirement hourly rate! I omitted unfortuatly to take any photos during this stage.
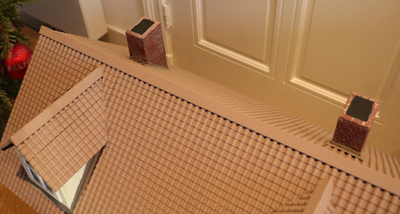
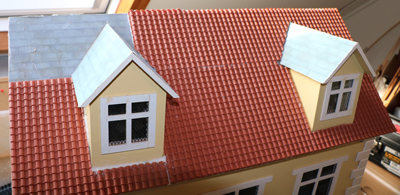
showing the ridge tiles and chimneys
The ridge tiles were L shaped plastic strip from the DIY store. All the way through, as I filled, scraped away glue and filler, sanded, filled again and re-sanded my undercoat of choice was Rustins red undercoat. As sold as an undercoat for metal and familiar from car repairs. I am a big fan of this product. It covers beautifully, dries matt and sands to a smooth even finish showing up all imperfections still needing work.
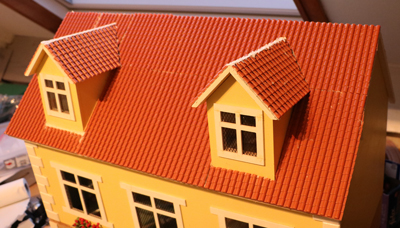
Which just left the fun part. Repainting. I stuck with the yellow colour chosen by the original maker, though I toned it down to something a bit more muted. I also stuck with white window frames and a red front door. For the roof I went for a brown shade, a sort of dark mushroom. If the target grandaughter had been English I would probably I have picked something redder but little F is Dutch and houses there tend to have brown or grey on the roof. Both the yellow and the mushroom are DIY store emulsion tester pots.
And here it is. The finished product. Eastern Manor, refreshed and ready to be enjoyed by a new generation. The little window boxes of tulips, the door, the name plate and topiary trees are all original. I can take no credit for them.
I commented at the start of ths article that it surprised me that it was a commercial kit. For at least five reasons. The fact the hinges were not recessed properly (or that this was left for the assembler to do), the roof obstructing the opening of the door, the rather crude window framing , the window boxes simply stuck on in such an unrealistic way and the positioning of the chimneys. It seems odd that a professional designer and manufacturer would have produced and offered something for sale with these characteristics. If I have regrets about the renovation it is that I left the windows and window boxes as they were rather than re-fashion them to something more realistic. I did contact Dolls House Emporium to ask about their product but they seemed to have neither knowledge or interest. Just an an item they bought and resold. Sad.
But I'm still pleased with it and little F seems pleased too with her house. Which is what it is about.

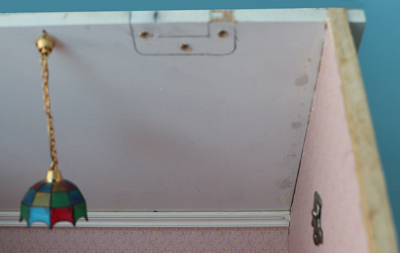
As delivered on Christmas afternoon 2019 -
complete with a string of lights along the
front.
As always, please
e-mail
Miniature Buildings
if you have something to add. Comments, criticisms,
extra thoughts, pictures, or even complete articles
for inclusion in the Miniature Buildings site
are all welcome. Or if you would like to be added to
my mailing list to hear when a new article is published.
David, March 2020 (updated August 2021)